Free version compared to full licensed version
You can use the free version of this plug-in with Lightroom’s Export feature to export your photos with their folder hierarchy to your own folder or to a Photo Upload publish service. Note: Use this plug-in from Lightroom’s Export button\menu item.
In addition, the paid for full version allows you to create published collections from where you can also export photos and their folder hierarchies.
For most people the free version of this plug-in, using Lightroom’s Export capability, does the job of exporting photos and their folder hierarchies perfectly.
All the tutorials on this page use features in the free plug-in.
Export to a new folder, retaining part of the folder hierarchy
1. Select the photos in Lightroom’s Library module that you wish to export.
2. Click “Export…”.
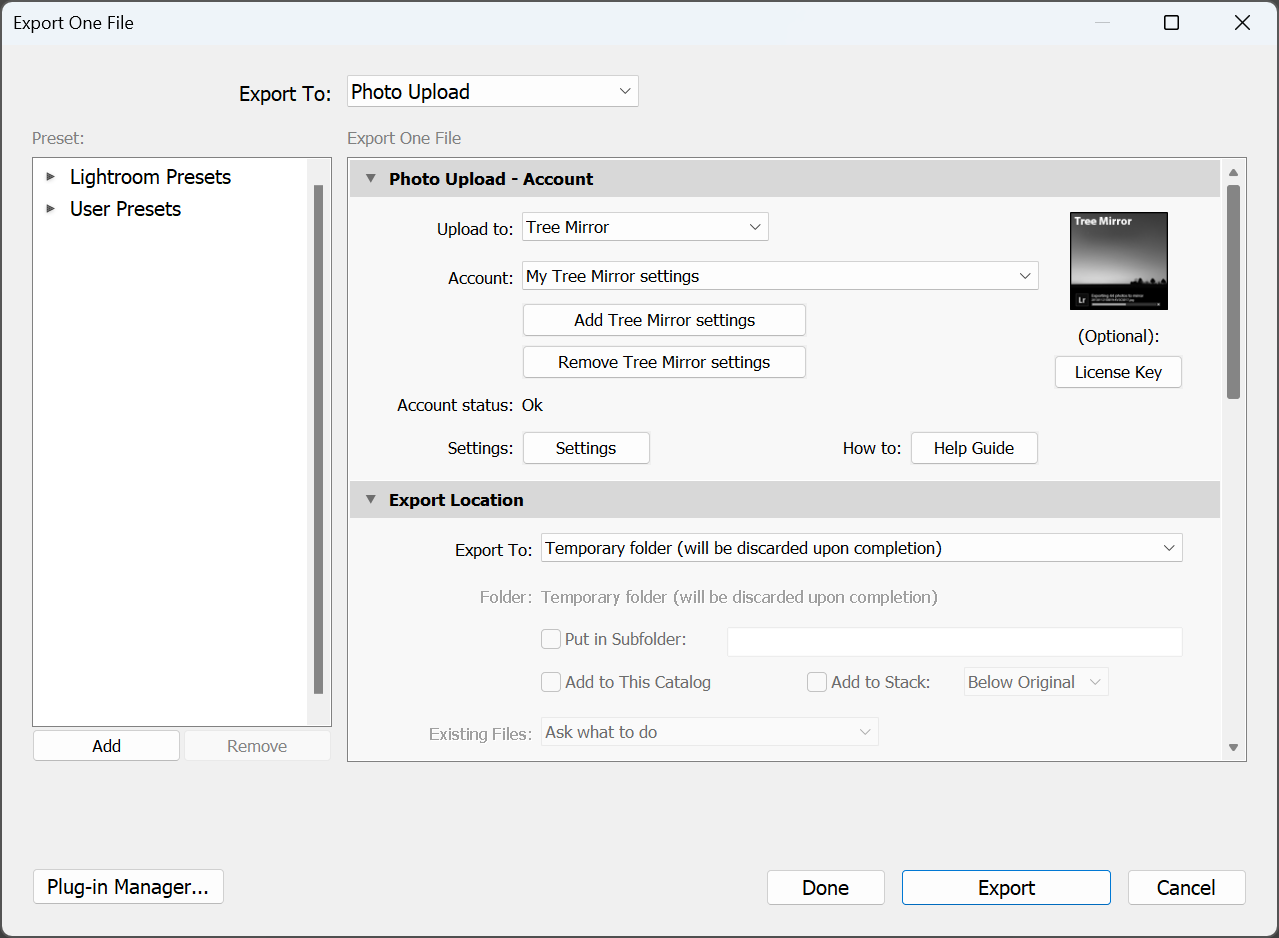
3. Change the “Export To:” in the top of the Export dialog to “Photo Upload”.
4. In the “Photo Upload – Account” section, choose “Tree Mirror” in the “Upload to:” box.
5. Use the “Add Tree Mirror settings” button to add an account for your Tree Mirror settings (you will only need to do this the first time you use the plug-in).
6. In the “Export Location” section ensure the “Export To:” box is set to “Temporary folder (will be discarded upon completion)”. This is a Lightroom setting, not a plug-in setting, and we don’t want Lightroom to make an additional copy of your photos.
7. Open the Settings window by pressing the Settings button.
8. In the “Source base folder:” text box, specify the base folder for the source (original) photos.
For example:
Z:\Pictures
9. Tick the check box “Export to folder:”.
10. In the “Destination base folder:” text box specify the base folder for the destination (exported) photos.
For example:
Z:\Pictures\Export 1080
Your Lightroom Export and Settings windows should look a little like this:
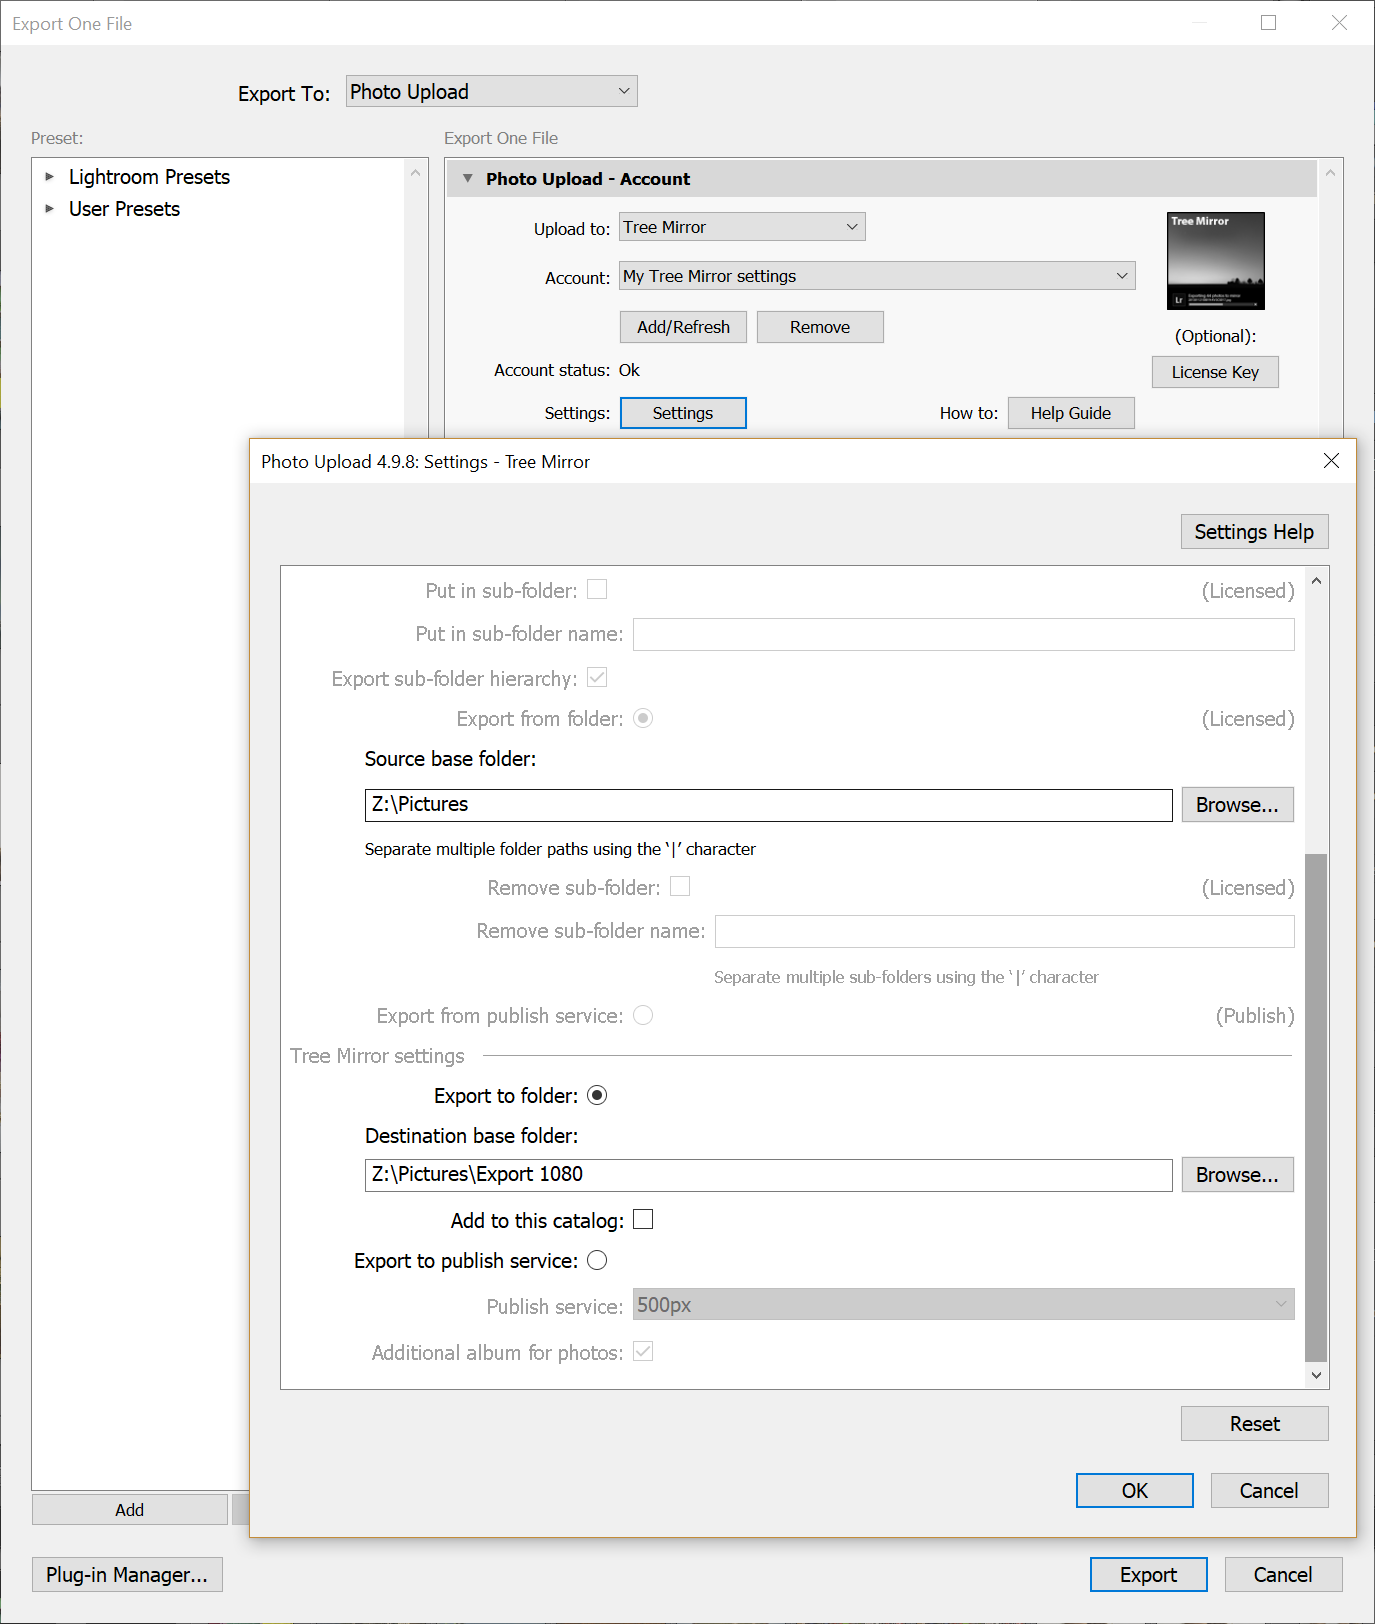
This will export the selected photos, and preserve any folder hierarchy in the path name after the specified source base folder.
For example, if you exported photos from:
Z:\Pictures\2010\2010-01-11 Aconcagua
Then with the settings above the photos would be exported to:
Z:\Pictures\Export 1080\2010\2010-01-11 Aconcagua
11. Click “Ok” to close the Settings window.
12. Finally, click “Export” at the bottom of the Export dialog to export your photos.
Export to a Lightroom published service, retaining part of the folder hierarchy
1. Select the photos in Lightroom’s Library module that you wish to export.
2. Click “Export…”.
3. Change the “Export To:” in the top of the Export dialog to “Photo Upload”.
4. In the Photo Upload – Account section, choose “Tree Mirror” in the “Upload to:” box.
5. Use the Add/Refresh button to add an account for your Tree Mirror settings (you will likely only need to do this the first time you use the plug-in).
6. In the “Export Location” section ensure the “Export To:” box is set to “Temporary folder (will be discarded upon completion)”. This is a Lightroom setting, not a plug-in setting, and we don’t want Lightroom to make an additional copy of your photos.
7. Open the Settings window by pressing the Settings button.
8. In the “Source base folder:” text box, specify the base folder for the source (original) photos.
For example:
Z:\Pictures
9. Choose “All” in the “Sub-folder names:” list (to export all the sub-folders).
10. Tick the check box “Export to publish service:”.
11. From the “Publish service” list choose the publish service for the destination (exported) photos.
Note: The publish service list will only show those publish services that are “powered” by the Photo Upload plug-in available from this Website. You cannot export photos to other types of publish service.
In the picture below there are numerous available Photo Upload publish services.
Your Lightroom Export and Settings windows should look a little like this:
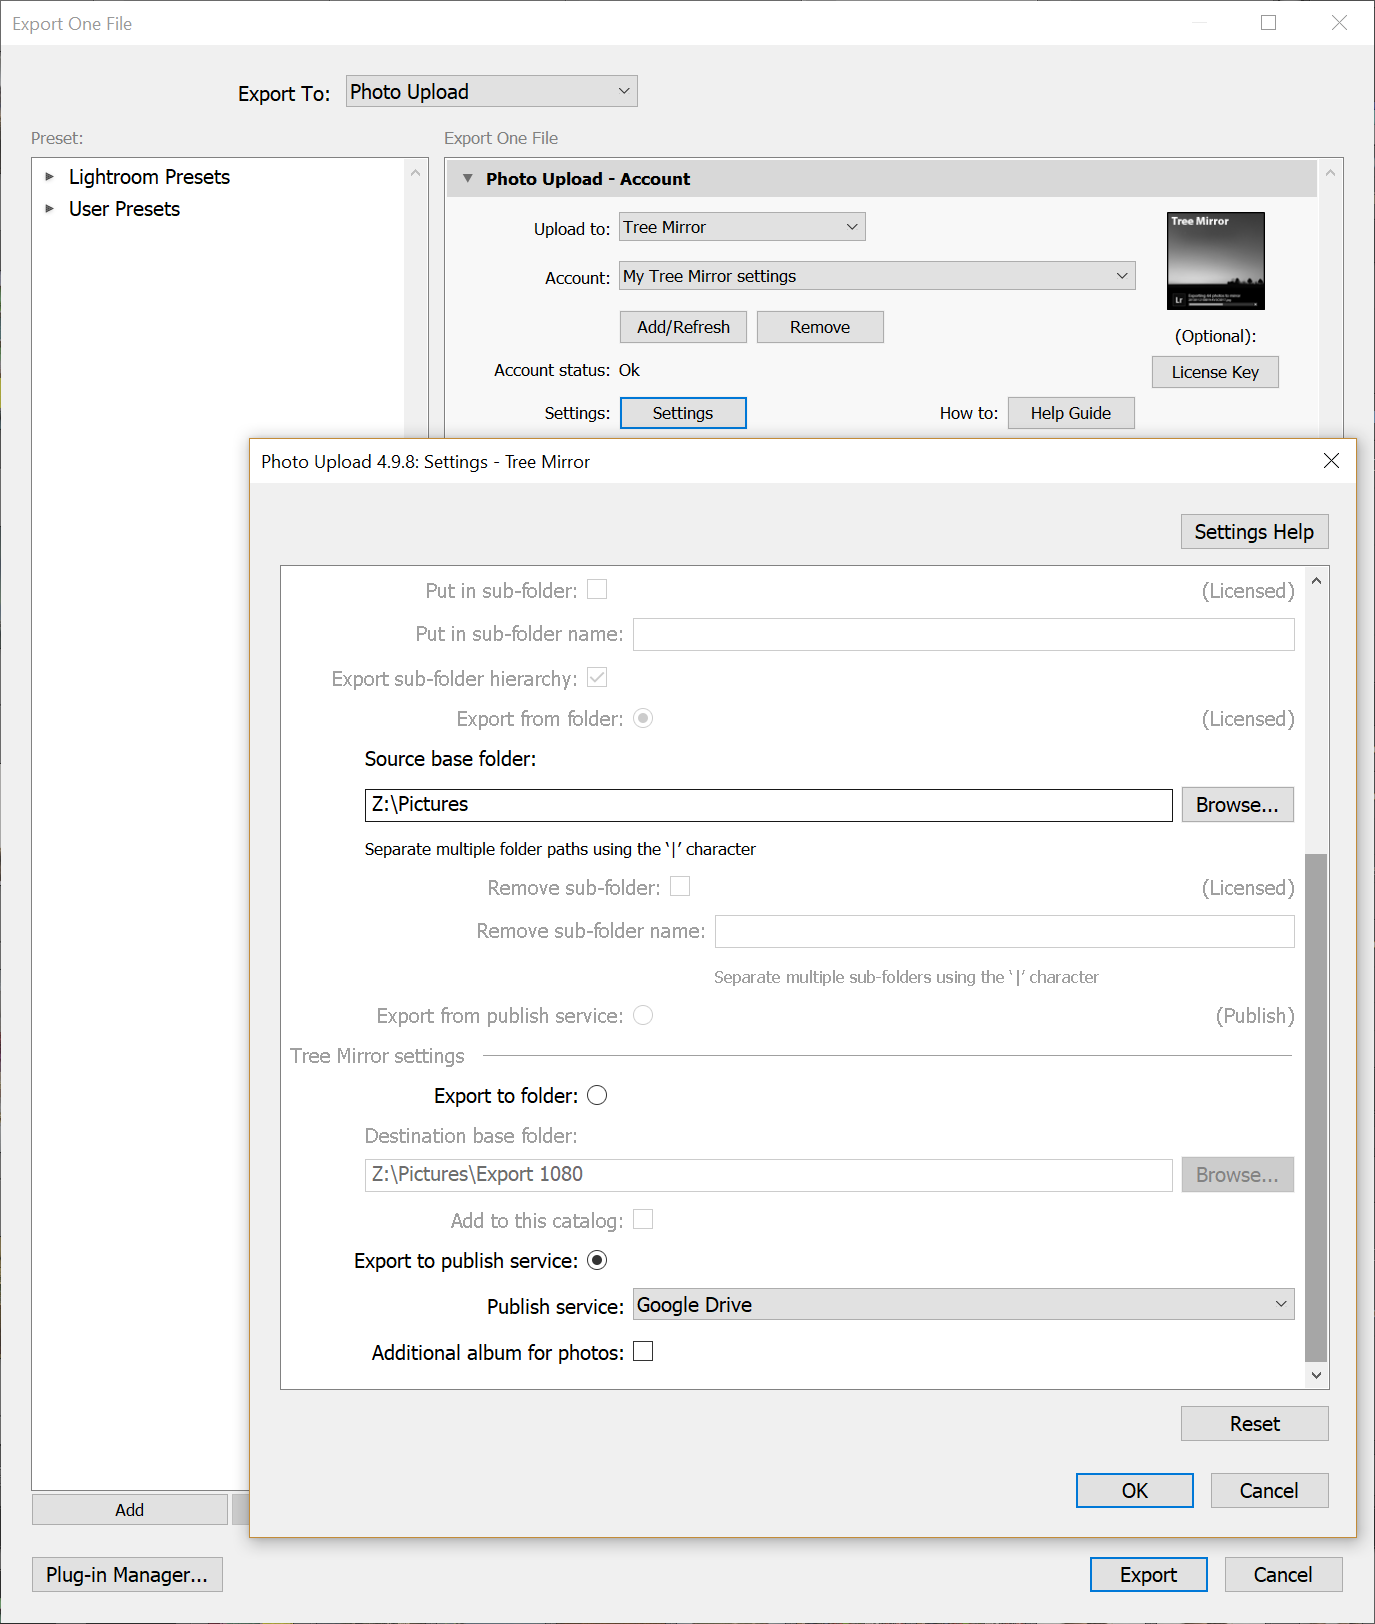
This will export the selected photos and preserve any folder hierarchy AFTER the specified source base folder.
For example, if you exported photos from:
Z:\Pictures\2010\2010-01-11 Aconcagua
Using the settings in this example. the photos would be exported to your publish service with the following hierarchy:
2010\2010-01-11 Aconcagua
12. Click “Ok” to close the Settings window.
13. Finally, click “Export” at the bottom of the dialog to export your photos.
Please leave your feedback in the comments section of this post. Thanks!
*** Standard word of warning. Photos are precious little things and I cannot be held responsible if this plug-in causes anything bad to happen to your photos that you cannot restore from a secure backup.
What file name should I use with Tree Mirror?
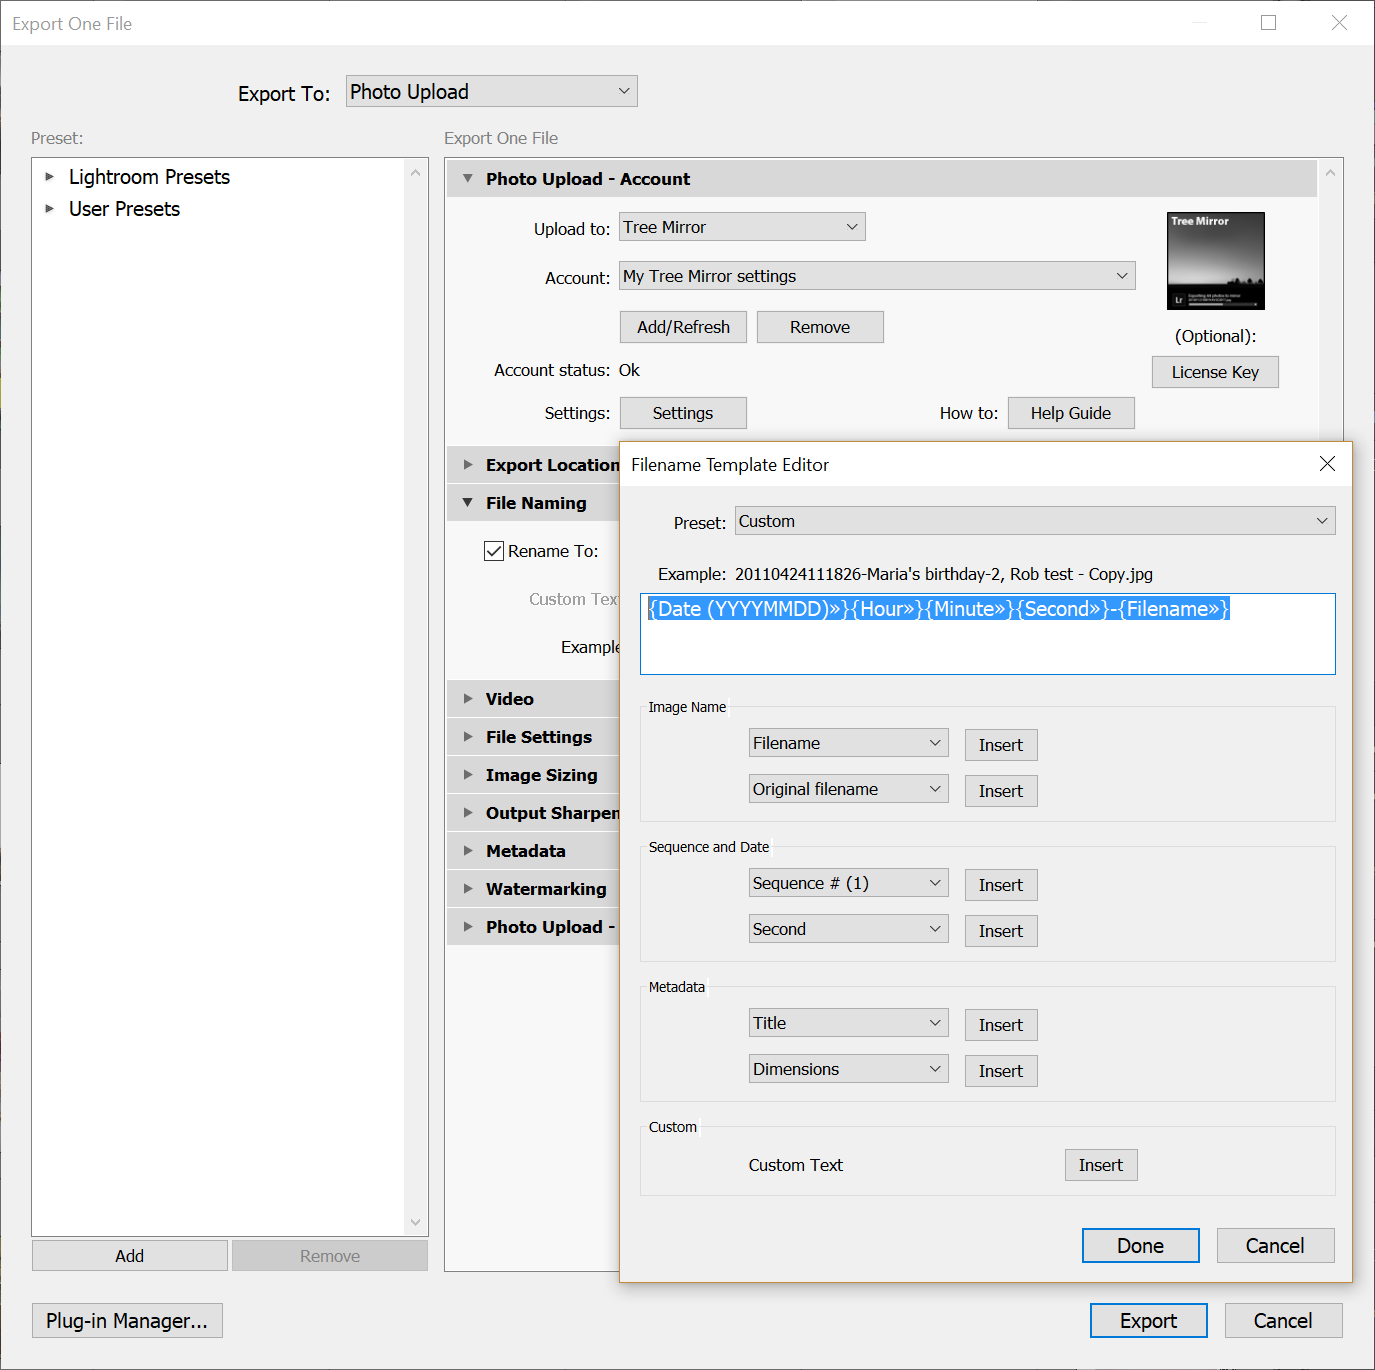
You can, of course, specify whichever file name you want for your exported photos using the “File Naming” section in the Export/Publish Service settings window.
However my preferred naming when dealing with photos taken within seconds of each other is to use the following custom format:
{Date (YYYYMMDD)»}{Hour»}{Minute»}{Second»}-{Filename»}
Example: 20150620165531-IMG_2526.jpg
This format includes the minutes and seconds from the photos properties.
Comments
2 responses to “Using Tree Mirror”
[…] neue Festplatte verschieben, ohne die Ordnerstruktur zu verlieren? Export Folder Structure oder Export Plugin Tree Mirror könnten […]
[…] Verwendung des Plugins in Lightroom: http://www.newpproducts.com/lightroom-plug-ins/tree-mirror-export/using-tree-mirror-export […]